Clinical Skills - NG Tube Insertion and Removal

Updated:

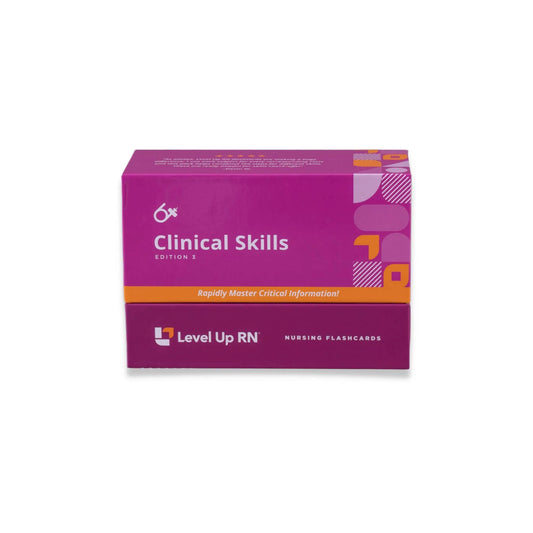
In this video and article, Ellis demonstrates insertion and removal of an NG tube along with best practices. This video follows along with our Clinical Skills - Nursing Flashcards.

This lesson is specifically on the physical process of insertion and removal skills during your nursing practice or clinicals. If you need to learn more about NG tubes, check out Nasogastric Tubes - Fundamentals of Nursing.

NG tube insertion

To prepare my patient for a nasogastric tube insertion, elevate the head of the bed. Cover their chest with a towel—you could also give them a basin (e.g., emesis basin) or tissues because insertion can stimulate their gag reflex and they might need to gag or potentially vomit, so you want to make sure you're prepared for those scenarios.

Before starting the procedure, get some tape prepared, because there will be points in this procedure where you need tape and only have one hand available. Assemble your other supplies: lubricant, nasogastric tube, pH strips, a container, and a piston syringe.

Open their NG tube. Estimate the length of tube you'll need by measuring from the tip of the nose, to the earlobe, to the xiphoid process (tip of the sternum). Mark the estimated length with tape or a marker.

Lubricate the tip of the tube to facilitate insertion: open the lubricant, insert the tube, and generously apply some lubrication. Ask your patient to flex their neck up, and insert it into the nare. If you meet extreme resistance, stop, withdraw, and either try again or try the other nare. Don't push past extreme resistance.

Instead of going into the esophagus with the tube, you can encourage your patient to swallow. If they're oriented and capable, you can give them a glass of water, they can take small sips, and you can instruct them to swallow to help ease the tube in. Insert the tube until the pre-estimated length you measured, and secure it to their cheek. If you don't secure it, it could slip back out and then you'd have to start all over again.

NG tube placement confirmation

To confirm placement, you can withdraw gastric secretions (aspirated contents of the tube) using a piston syringe as Ellis demonstrates in the video. Measure the pH of the secretions, it should be under 5. Stomach acid is acidic!

The gold standard for confirming initial placement is with an x-ray. It's important to check that the tube is actually in their stomach and not somewhere incorrect, like a lung!

Once placement is confirmed, the tube can be anchored more securely and attached to suction. Anchoring an NG tube more securely simply means anchoring it to the patient's nose. There are devices that allow you to do this, but as Ellis notes in the video, every facility usually has tape.

You can then attach the remaining lengths to the patient's gown so that it doesn't pull, and then it can be connected to suctioning if indicated.

NG tube removal

Once orders have been given for a patient's NG tube to be removed, you can follow this process to remove it.

Turn off the suction. Depending on the facility, you may need to retest the placement. Some facilities want you to flush the tube before you withdraw it, and if you need to flush the tube, you need to check placement first. So you can use the piston syringe to check the pH again. The NG tube can then be flushed with 30 ml of water or air.

Once flushed, remove the tape or securement device from the patient's nose.

Make sure they have a towel on their chest, because when the tube is pulled out, sometimes mucus and other fluid comes out with it. Instruct your patient to hold their breath, and pull the tube gently, but steadily (quickly, but smoothly). Offer the patient oral care and a tissue to blow their nose.

Best practices for NG tubes

  • Do not instill air into an NG tube to check initial placement.
  • Do not pull on the tube or insert anything into the air vent.
  • Keep the head of the bed elevated.
  • Assess nares daily for potential mucosal breakdown.

Full Transcript: Clinical Skills - NG Tube Insertion and Removal

Hi, I'm Ellis with Level Up RN. In this video, I'll be demonstrating how to insert a nasogastric tube. I'll be utilizing the steps that are listed on our Clinical Nursing Skills cards. So if you have the deck, grab your cards and follow along with me. If you don't have the deck and you're interested in checking it out, head on over to leveluprn.com. After the demonstration, I'll come back here and show you a couple more things.

To prepare my patient for a nasogastric tube insertion, I've gone ahead and elevated the head of the bed. I'm going to cover their chest with a towel. I could also give them a basin or an MSS basin and maybe even some tissues because this can stimulate their gag reflex and they might need to gag or potentially even vomit, so I want to make sure we're prepared for those scenarios. So before I start the procedure, I like to get some tape prepared because there will be points in this procedure in which I need tape and I only have one hand available. I'm going to do a couple of pieces of tape to make sure that they are prepared for use. You can see I've got lubricant. I've got my nasogastric tube. I have pH strips, a container, and a piston syringe. I'm going to open their NG tube and my first step is to measure it. So I need to measure where on this tube I should probably insert or stop the insertion, right? So I'm going to start at the tip of their nose. I'm going to go to their earlobe. And from their earlobe, I'm going to go to their xiphoid process or the tip of their sternum. So I can estimate that at about 50 is where the end of this tube should be. So I should insert it about that point. So I'm going to mark that with some tape, but you can do this with a marker if you wanted to.

Once I note that, I'm going to lubricate the tube to facilitate the insertion. So I'm going to open my lubricant, and I'm going to insert the tube and generously apply some lubrication. Once I'm ready, I'll go ahead and ask my patient to flex their neck up a little bit. I'm going to insert it into the nare. If I meet extreme resistance, I need to stop, withdraw, and either try again or try the other nare. I don't want to push past extreme resistance. So I'm going to go ahead and insert it, and to help facilitate it into the-- instead of going into the esophagus, I can encourage them to swallow, swallow, swallow. If they're oriented and capable, I can give them a glass of water and they can take small sips during this time and I'll tell them to swallow, swallow, swallow. And you can see I've made it to my tape, so I've made it to what I've estimated is the correct length and I'm going to go ahead and secure this to their cheek. If I don't secure it, it could slip back out and then we would have to start all over again.

So while it's secured, I want to double check that this is in their stomach and the best way to do that is to use my piston syringe, withdraw some of the gastric secretions. So I'm going to just withdraw on it, gastric secretions would come out. I would drop them into my cup. I would take one of my pH sticks, I would dip it in, and the pH stick would indicate what number this is. It needs to be less than five for me to feel comfortable that it's in the correct spot. I will also note that an x-ray is the gold standard. So especially if I'm going to use this NG tube to insert anything medication, tube feeding, we need to do an x-ray to make sure that we're actually in the stomach and not in something else like their lung. So after I check the pH and I'm fairly comfortable, but then especially after I do the x-ray and I'm confident that we are in the correct placement, I can not only anchor this more securely, but I can attach it to suction. Anchoring it more securely simply means anchoring it to their nose. There are devices that allow you to do this, but everywhere has tape. So I can split halfway down and put the solid portion on their nose and wrap the remaining portion with the part I did halfway. So this is called the split tape method. It's not super friendly on mannequins. There we go. I'll move that one and I can move that one, so that's a little more secure.

I could then attach something to their gown so that this doesn't pull from here to here, so I can secure that to their gown as well. This portion should always be above their stomach, and then this is how I connect it to suction. So if ordered, I would simply plug this into my suction tubing which is connected to my suction canister. My suction canister is connected to the vacuum of the suction on the wall, then I would turn that on. I can use this dial to determine what suction they need to be on, and I can set it for consistent or intermittent suctioning. Once ordered for it to be removed, my first step is to turn off the suction, disconnect it from suctioning. And then depending on the facility, it's optional to retest placement. So some facilities want you to flush the tube before you withdraw it. And if I need to flush the tube, I need to check placement first. So I would use that piston syringe, check the pH again, and then I would flush the NG tube with 30 ml of water or air.

Once I flushed it, I would remove the tape or securement device from their nose. I would again make sure they have a towel, a tissue. Because once this comes out, a lot of times mucus comes with it and they may want to blow their nose and there might be a lot of mucus collected there. I'm going to say, "All right. On the count of three, I want you to hold your breath while I pull this out." I'm going to pull it gently but steadily, right? One, two, three and we're done. And like I said, this is often covered in mucus, so I like to just cover everything up with my glove. They're often coughing and blowing their nose at this point. I discard this and give them anything they need to clean up. And that's how I insert, connect to suction, and take out a nasogastric tube.

During that demonstration, I utilized one of these NG tubes. Now this NG tube comes with an adapter and this adapter allows the tubing to be attached to other tubings. It also allows it to be attached to the suctioning. But during the insertion, it should be like this because this allows the tubing to be clamped. So when I'm inserting the tube, there's no risk for gastric secretions to come out before I'm ready to handle them. For example, if it were like this and it were hanging while I'm inserting my tube, gastric secretions could potentially start dripping out. So while I'm inserting or even removing an NG tube, I should probably clamp that tube off like this. I would then remove my blue piggy tail and I would attach it to the suction if that were part of my patient's order.

Speaking of my blue port, I also wanted to drive home that this should never ever, ever have anything put into it. I frequently see my students connecting their piston syringe to this port and withdrawing the residual or even flushing through this port, that is not what this port is for. The blue port is your air vent, so only air should ever go in or out of it. All of your other activities will be done through this main port right here, so you would simply remove your adapter and you would put your syringe into that larger hole. You would not withdraw residual or insert a flush or medications through this blue port.

Back to blog

Leave a comment

Please note, comments need to be approved before they are published.